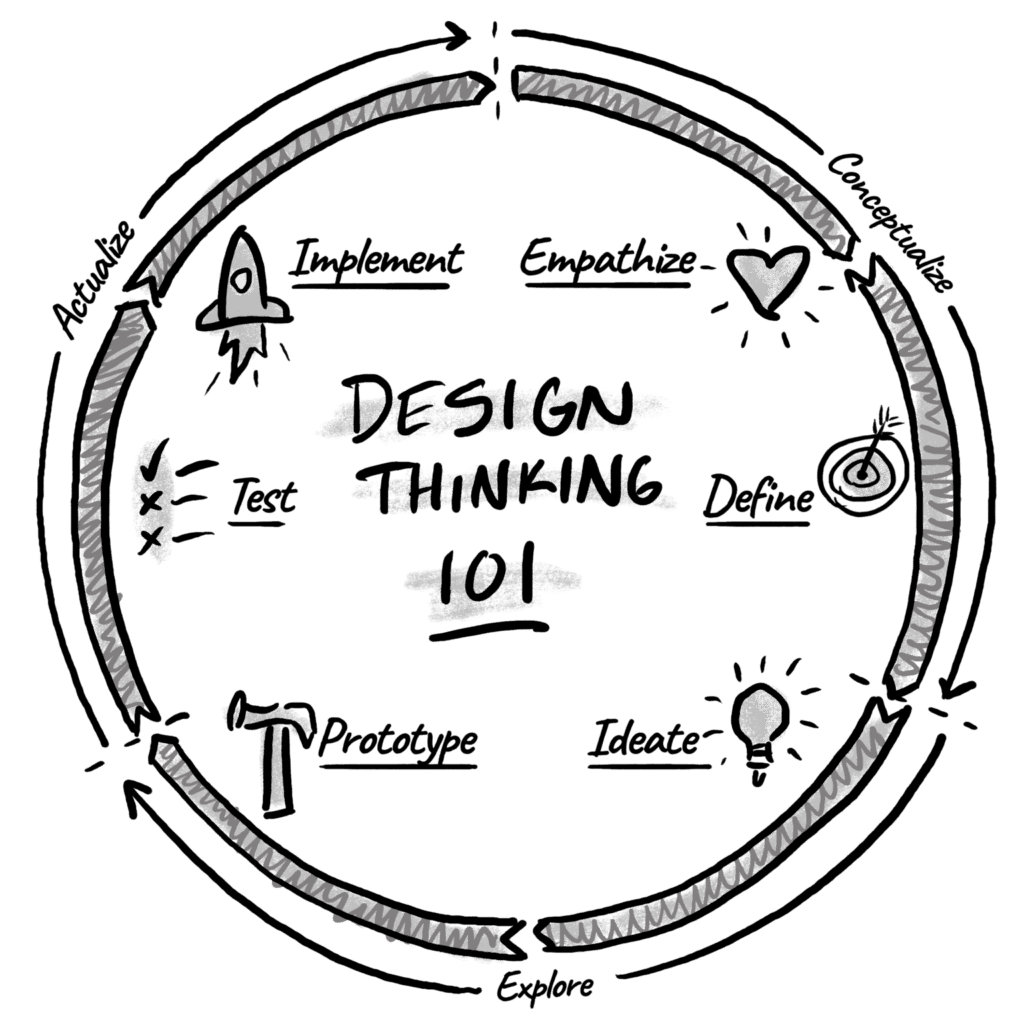
The five steps that make up the design thinking process: Empathize, Define, Ideate, Prototype, and Test. Plus the human-centered method underneath every successful AI transformation.
The design thinking process is a 5-step human-centered framework for solving complex problems: Empathize, Define, Ideate, Prototype, and Test. Each step is designed to reduce assumptions, surface real user needs, and produce solutions that work in practice rather than just on paper.
79% of companies report that design thinking improves their ideation process, and 71% have seen a significant shift in work culture after adoption, according to the Design Management Institute’s research. The process is not limited to designers: product teams, operations leaders, healthcare administrators, and cross-functional groups working through AI adoption all use it to address high-stakes, human-dependent problems where the right question matters as much as the right answer.
This guide walks through all five steps in sequence, with practical notes on what each step produces, the most common mistakes practitioners make at each stage, and how the process applies to AI adoption programs where the human-centered foundation matters most.
What is the Design Thinking Process?
Design thinking is a process for creative problem-solving that helps teams move past the first good ideas and discover creative solutions. Rather than a one-shoe-fits-all mindset, the approach encourages a holistic view where uncertainty and ambiguity are welcomed and embraced so a team can consider all sides of a problem. A design mindset can be applied to any organizational challenge, including how to introduce AI into a team without breaking the trust and rhythm that already works.
The method is steeped in a deep belief that the end-user should be at the heart of every decision. The benefit of design thinking is that, through empathy for your customer, employee, or partner, you create products, processes, and adoption strategies that truly help people. That same empathy is what separates AI adoption that lands from AI adoption that stalls.
In this article, we will explore the five-step process that enables teams to come up with impactful solutions to real problems, vetted by the people they intend to serve before they have even been built. These key steps launch you into an innovative and experimental approach, whether you are designing a new product or rolling AI into the daily work of a 200-person team.
Pro-tip: use our Liberating Structures templates to get the most out of the design-thinking process with your team. At Voltage Control we also love to use the Workshop Design Canvas.
The 5-Step Design Thinking Process
1. Empathize
The first stage of the design process is to develop a deep understanding of the people affected and their unique perspective so you can identify and address the right problem. To do this, design thinkers cast aside assumptions about the problem, the people involved, and the world around them (because assumptions can stifle innovation). This allows them to consider all possibilities about the people they serve and their needs. In 2026, this step is supercharged by AI sentiment analysis, which helps teams process thousands of user interviews and global trends in seconds to find hidden patterns. The team still has to choose what matters.
Typical Activities
- Observations: You go where your users go and see what they care about.
- Qualitative Interviews: You hold one-on-one interviews with a handful of users to understand their attitudes on the topic you are exploring. Asking someone to tell a story about the last time they experienced the problem you are investigating provides a rich description that highlights details you might not have otherwise considered. Use our Interview Observation template to interview someone close to the problem you are working on.
- AI-Enhanced Synthesis: Use large language models to summarize key pain points from massive data sets while preserving the human signal. This is the same pattern we use when running AI readiness assessments inside organizations: machines surface scale, people choose meaning.
- Immersions: Step into the user’s day-to-day so you can feel and experience it.
Immersions: Step into your user’s shoes so you can feel and experience their day-to-day.
Tools like empathy maps consolidate the valuable information gleaned from interviews. Empathy maps capture what people do, say, think, and feel in the context of the problem. They help colleagues understand the context and how people experience it.
2. Define
Pull together the information gathered while empathizing. The next step is to define the problem statement clearly. The ideal problem statement is captured from the perspective of human-centered needs rather than business goals. For example, instead of setting a goal to increase signups by 5%, a human-centered target would be to help busy parents provide healthy food for their families. When the problem is AI adoption, the same rule applies: instead of “roll out the AI tool to 200 people,” define “help mid-level managers feel confident enough with AI to use it for the work they already own.”
Based on the frustrations you observed or heard about, generate questions for how you might solve them.
Typical Activities
- Clustering and Themes: There are many ways to do the Define phase, but most include a wall of sticky notes filled with quotes, observations, and ideas from your research. Group and cluster ideas until you find the prevailing themes.
- Problem Statement: Take time to properly articulate the problem statement. Answer the questions: What is the problem? Who has the problem? Where is the problem? Why does it matter?
As you explore empathy data, focus on identifying patterns and problems across a diverse group of people. Gathering information on how people are currently attempting to solve the problem and how they explore alternatives provides clues to underlying root problems.
You cannot solve every problem your users face. Identify the most significant or painful issues to focus on as you move forward.
3. Ideate
Now that the problem is clear, it is time to brainstorm. Today’s teams often use AI co-creators during brainstorming sessions to push past obvious answers and spark concepts that the room would not have reached alone.
Typical Activities
- Brainstorming: Brainstorming is a critical part of the ideation phase. It generates a wide variety of ideas, all aimed at addressing the problem or challenge at hand. It allows the entire team to bring their perspectives, experiences, and insights, fostering diversity and richness in idea generation. Ideas shared can serve as stepping stones to innovative, out-of-the-box solutions.
- Worst Possible Idea: The “Worst Possible Idea” activity may seem counterproductive, but it encourages creativity and eliminates psychological holdups that stall innovative thinking. It allows team members to brainstorm and share their worst ideas without fear of judgment or criticism. Identifying why an idea is the worst can help in understanding the parameters and constraints of a problem.
The ideation stage marks the transition from identifying problems to exploring solutions. It flows between idea generation and evaluation, but it is important that each remains separate.
When it is time to generate ideas, do so quickly without focusing on quality or feasibility. Ideation techniques prioritize quantity over quality so you can move past the first good ideas and find the truly novel ones. Only after you have exhausted idea generation do you move on to evaluate.
The ideation phase is usually a creative and freeing phase because the team has permission to think out-of-the-box before deciding what to prototype.
4. Prototype
It is time to experiment. Through trial and error, your team identifies which of the possible solutions can best solve the identified problem. This typically includes scaled-down versions of a finished product or system, so you can present and get feedback from the people they are intended to serve.
Typical Activities
- Create a Vision Board: This visual representation of ideas, inspirations, and intended outcomes allows team members to envision the desired final product. The vision board is a shared reference point for the whole team. It facilitates communication, aligns understanding, and encourages creative problem-solving.
- Rapid Prototyping: The aim of rapid prototyping is to create low-cost, scaled-down versions of the product or specific features quickly for initial testing. Use paper, sticky notes, cardboard, or digital mockup tools. Use our Take 5 template when you want to collect diverse ideas from the entire room.
With the advent of generative tools, the gap between a paper prototype and a functional mockup has shrunk. It is now possible to use generative design and no-code tools to build interactive models in hours rather than weeks. The same is true for AI adoption pilots: a “prototype” can be a single team running a constrained AI workflow for two weeks before any larger rollout.
The goal is to start with a low-fidelity version of the intended solution and improve it over time based on feedback. Begin with a paper prototype to learn quickly with minimal effort. The prototype should be a realistic representation of the solution that allows you to gain an understanding of what works and what does not. It is changed and updated based on feedback from the Test phase in an iterative process.
5. Test
The prototype is at the center of the final phase as we put all our ideas to the test. The testing phase is part of an interactive cycle. You will have the opportunity to hear from your users again, just as you did in the Empathize phase. User testing is critical to understand how your audience will react to the ideas in your prototype and how desirable that experience will be.
- Observational Testing: Real users interact with the final prototype in a controlled setting while the design team observes their behavior and responses. The goal is not just to confirm whether the solution works as intended but to gain deeper insights into how the user interacts with it, how they approach the problem the product is meant to solve, and where difficulties or confusion arise.
- Iterative Testing: This process uses the results of initial testing to make improvements, and then tests again. Use our 5 Act Interview Cheat Sheet to build the right team for the project.
Testing with real users is essential because everything is ultimately about the people who will use your products. After you collect insights, revisit the problem statement and reflect on how well the prototype is meeting needs and resolving frustrations.
In 2026, teams often perform hybrid testing, combining real-world user interaction with data-driven simulations to predict long-term behavior.
Applying these five steps to AI transformation? The same shape works: empathize with the people whose work is changing, define the human problem before the AI use case, ideate with the team in the room, prototype with one constrained pilot, test with the people doing the work. Read more in Adopting AI-Driven Change Management or explore the AI Transformation Program.
Design Thinking in the Age of AI
The five-step shape has not changed. The work inside each step has. Three shifts matter most for leaders running AI transformations:
- Hyper-iteration: The line between steps is blurrier than ever. Because prototyping is now fast, teams jump between Testing and Empathizing in a single afternoon, creating a live feedback loop that was impossible a few years ago.
- AI as a collaborator, not a tool: AI is now part of the room, not a feature you reach for. From analyzing empathy maps to generating prototype code, AI lets design thinkers focus on high-level strategy and emotional intelligence. The judgment about what is meaningful still belongs to the team.
- People-first adoption: Most AI initiatives fail at the human layer, not the technical layer. Design thinking gives leaders a way to move from “we deployed the tool” to “the team actually uses it.” That is the New Friction we keep seeing across enterprise AI rollouts, and it is the reason design thinking is having a second moment.
Our tools and timelines have evolved. The target has not: meaningful impact through a deep understanding of human needs.
Putting the 5 steps to work.
Design thinking is not a poster on the wall. It is a way of moving through a problem with other people. The teams that get the most out of it have someone in the room whose job is to hold the process so everyone else can hold the problem.
If you are using design thinking to drive AI transformation, our AI Transformation Program is built on the same five-step shape, applied to the specific friction of getting AI adopted across a team or org. If you want your own people to be the ones holding the process, the Voltage Control Facilitation Certification is where leaders learn to do that work.
Need an expert facilitator for your next meeting, gathering, or workshop? Let’s talk
FAQs
- What are the 5 steps of the design thinking process?
The five steps are Empathize, Define, Ideate, Prototype, and Test. Empathize involves research into the people affected by the problem. Define synthesizes that research into a clear problem statement. Ideate generates solution options. Prototype builds a low-fidelity version to test assumptions. Test puts the prototype in front of real users and surfaces what to refine.
- How long does the design thinking process take?
It depends on scope. A focused design sprint can run the full 5-step cycle in 3-5 days. A complex organizational challenge might take 6-12 weeks. The process is iterative rather than linear, so teams often return to earlier steps as they learn more.
- What is the difference between design thinking and agile?
Design thinking is a problem-framing methodology focused on understanding users and defining the right problem. Agile is a delivery methodology for building and shipping solutions iteratively. They are complementary: design thinking informs what to build, agile governs how to build it.
- Can design thinking be applied to AI implementation?
Yes. Design thinking is particularly valuable in AI implementation because AI projects fail most often at the human-adoption stage rather than the technical stage. Empathize and Define help teams identify which problems AI should solve. Prototype and Test help validate AI tools before organization-wide rollout, reducing the risk of adoption failure.
- What is the most important step in design thinking?
Most practitioners cite Empathize as foundational because every subsequent step depends on how accurately you understand the people affected by the problem. Skipping or rushing this step typically produces well-built solutions to the wrong problem. That said, Define is where many teams fail in practice: translating research into a problem statement that is specific enough to generate useful ideas.